Adobe Premiere Pro
Exporting quick guide 🚀
Export a single video.
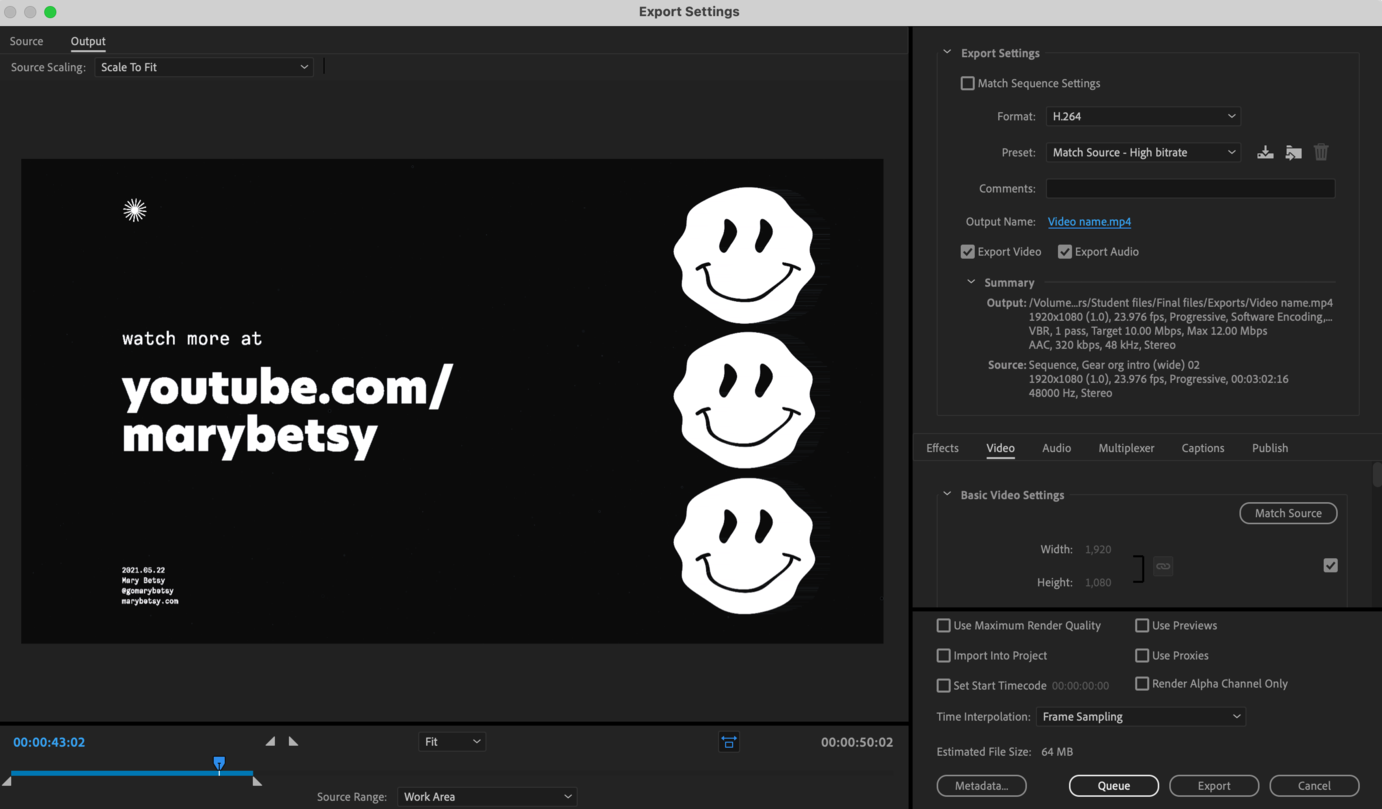
➊ Choose a sequence to export. Whichever sequence is open on top in the Timeline panel will be exported.
➋ Open export settings. Go to File → Export → Media, or use the shortcut Cmd/Ctrl + M.
➌ Decide what to export. Choose how much of your timeline you want to export at the bottom left of the Export Settings window.
➍ Choose a file format. Pick H.264 at top right if your video's going online.
➎ Pick a preset. Choose Match Source - High bitrate at top right to match your sequence size and pack in lots of bits of data.
➏ Click Export. This button at bottom right will start your export. (It could take several minutes.)
Export multiple videos.
➊ Click Queue. Follow the steps above for exporting a single video, but at the bottom right of the Export Settings window, click Queue instead of Export.
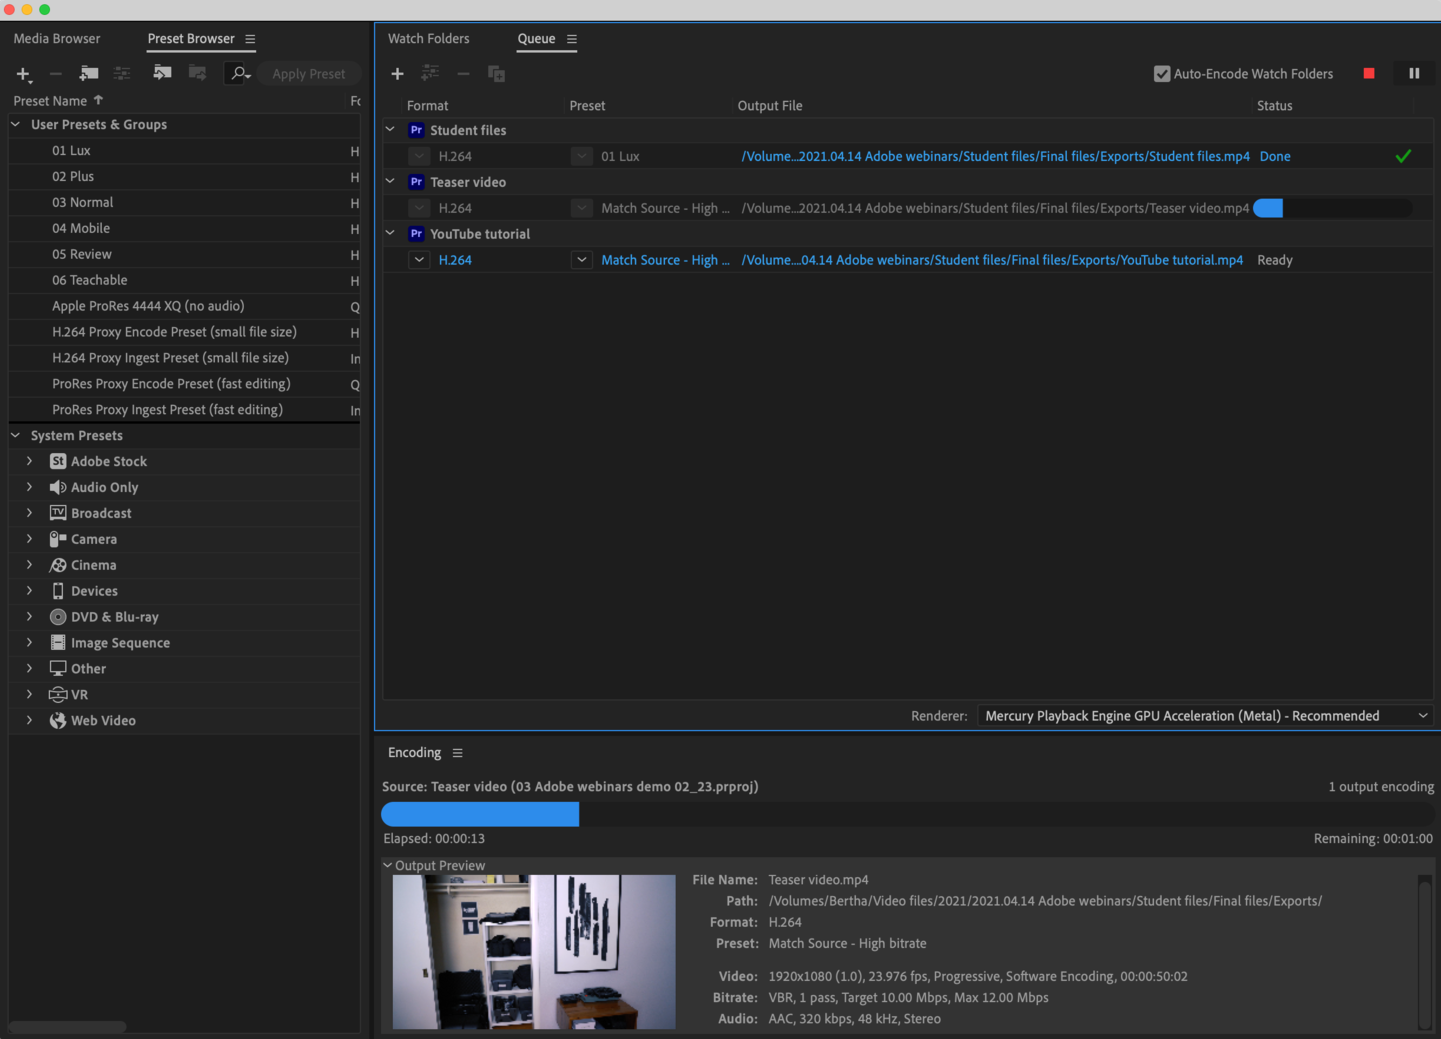
➋ View the Queue. The Adobe Media Encoder app will automatically launch and add your export job to its Queue panel.
➌ Queue more export jobs. Add more export jobs from Premiere to Media Encoder by repeating earlier steps.
➍ Start exporting the queue. Go to the Media Encoder app and click the Play button at top right to start exporting the queue.

