Audio editing recap
Index
01. Capturing sound
02. Voiceovers in post
03. Footage prep
04. Speaking clips
05. Transitions
06. Creative effects
07. Music and sounds
Capture clean sound with good levels.
Don’t overcook your egg.
Audio is like an egg: once you burn it, you can’t go backward, so prioritize recording quality sound before you ever start editing.
Record voiceovers inside Premiere.
Set up your mic.
Connect a mic to your computer or use the built-in one.
Go to the Premiere Pro menu → Preferences → Audio Hardware and select your mic.
Start recording.
Press the microphone icon at the front of the timeline to record a voiceover while editing.
An audio clip will automatically be created on your timeline when you’re done.
Prepare to edit your audio footage.
Control audio tracks.
Click mute, solo or lock at the front of the timeline to control which audio tracks play and which you can edit.
Prioritize your hardware.
Aim for your audio to sound good on both speakers and headphones, prioritizing whichever you think your audience will use most.
Detach audio from video.
This isn’t needed, but in case you do need to separate audio footage from a video clip, just right-click and choose Unlink.
Edit speaking clips.
Use a Preset & move on.
Select all speaking clips.
In Essential Sound, select Dialogue.
In the Preset dropdown menu at top, pick Podcast Voice.
This will adjust the settings below for you.
monitor loudness.
Use the Audio Meters panel to make sure your speaking clips average between -12 and -6 dB. If the top lights up red, you’re in trouble.
Match average loudness.
Select all speaking clips.
In Essential Sound, select Dialogue.
In the Loudness tab, click Auto-Match.
Normalize peak loudness.
Right-click clips & select Audio gain (or press G).
Select Normalize all peaks.
Enter -6.
Manually adjust loudness.
Select an audio clip.
Right-click & select Audio gain (or press G).
Select Adjust gain.
Enter a positive or negative amount.
Remove unwanted sounds.
Select an audio clip.
In Essential Sound, select Dialogue.
In the Repair tab, hover over filters for info.
Check a filter & adjust the amount.
Remember less is more.
Add transitions.
Cross-fade two clips.
In the Effects panel, search for Constant power.
Drag the effect between two clips.
Adjust length.
Cross-fade all clips.
Select all audio clips.
In Sequence menu, select Apply Audio Transition.
Alternatively, press Shift + Cmd/Ctrl + D.
Change the default transition length.
Go to the Premiere Pro menu.
Choose Preferences and then Timeline.
Change Audio Transition Default Duration to 0.04 seconds if you’re making a lot of mid-sentence cuts.
Add creative effects.
Filter how your audio sounds.
First, find a filter in the Effects panel. Here are a few favorites that’ll make you sound weird:
Analog Delay
Chorus/Flanger
Distortion
Guitar Suite
Pitch Shifter
Reverb
Next, drag the effect to a clip.
Lastly, adjust the effect’s settings in the Effect Controls panel. (Hint: If you’re totally lost about where to start, try clicking the Edit button if you see one.)
Edit music and sound effects.
Find sound effects.
Check my sound effects resources for free dings, claps, pows and more.
Find music.
Check my music resources for the best sites for soundtrack songs.
Get the right levels.
Got sound effects or music playing at the same time as speaking clips? Lower the gain so they don’t overpower your dialogue.
Keep music around -18 dB.
Keep sound effects around -20 to -10 dB.
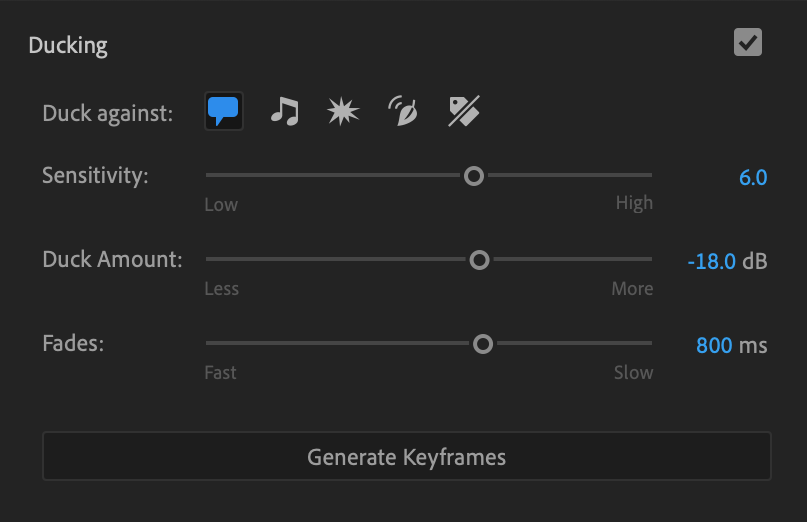
duck background music.
To fade music down when you’re talking and back up when you’re not, use Premiere’s auto-ducking feature.
Select all music clips.
In Essential Sound, select Music.
Expand and check the Ducking tab.
Choose Duck against dialogue clips.
Click Generate keyframes.


