Color in Adobe Premiere Pro
Open Premiere’s color panels.
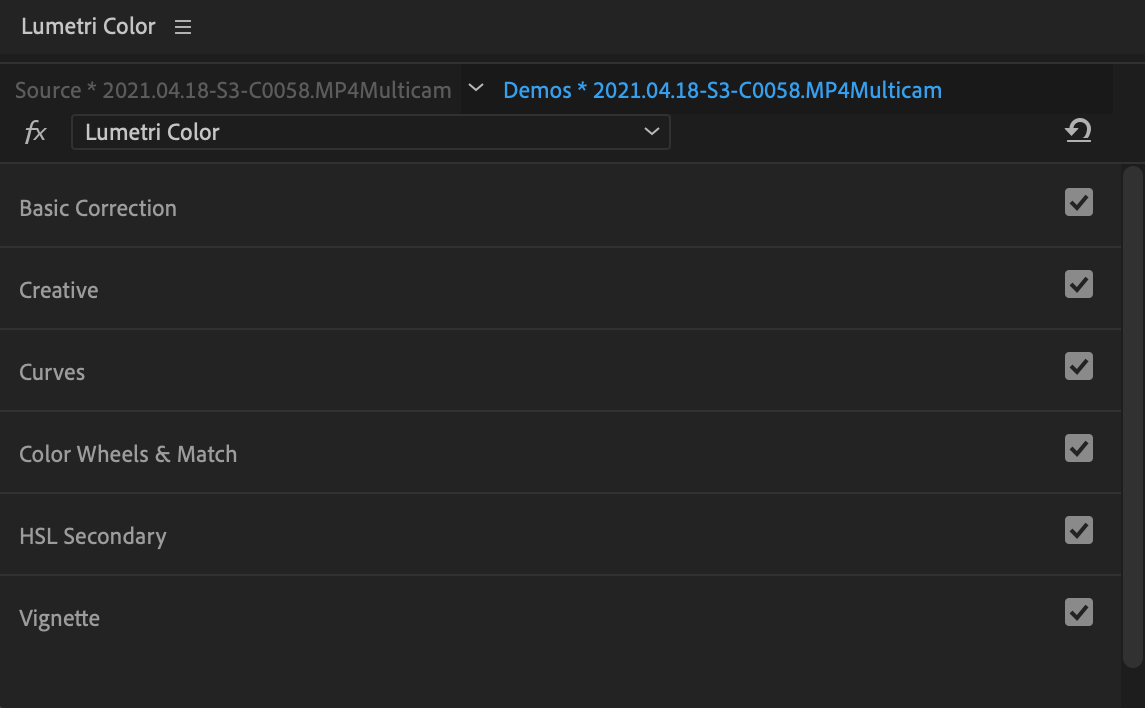
Open Lumetri Color.
Go to the Window menu → Lumetri Color to open this panel. It’ll let you adjust color settings for the clip selected on your timeline.
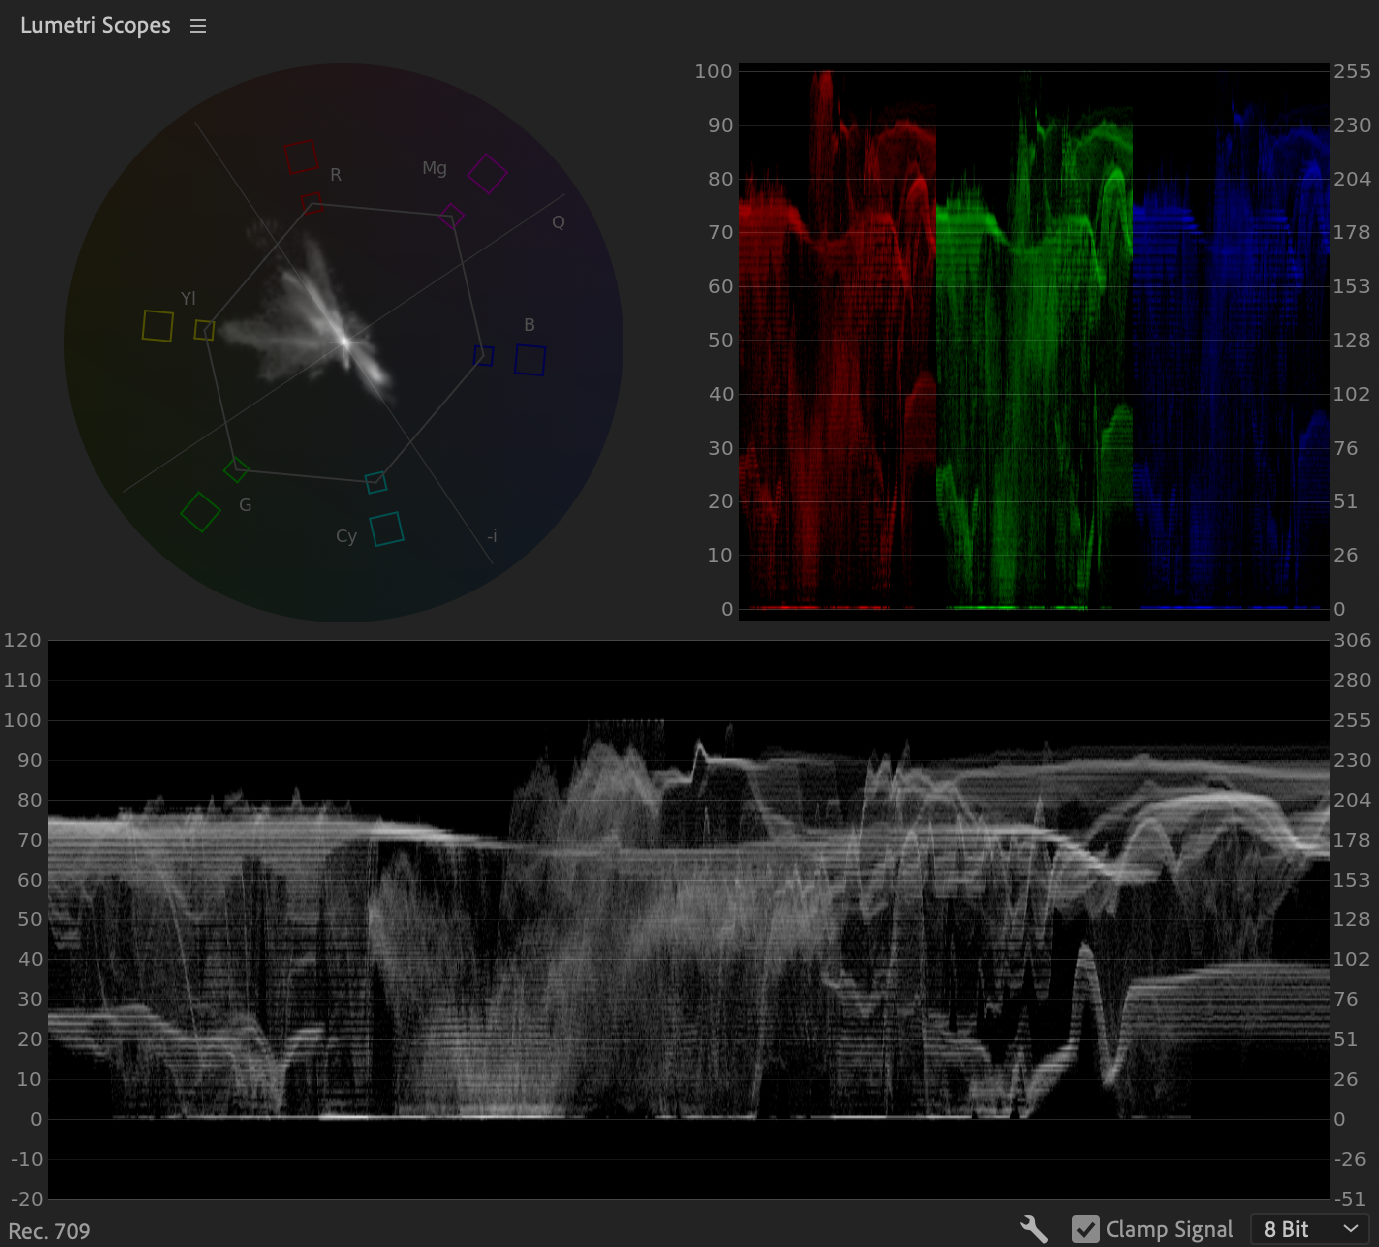
Open Lumetri Scopes.
Go to the Window menu → Lumetri Scopes to open this panel. It’ll let you monitor the color settings for the clip selected on your timeline.
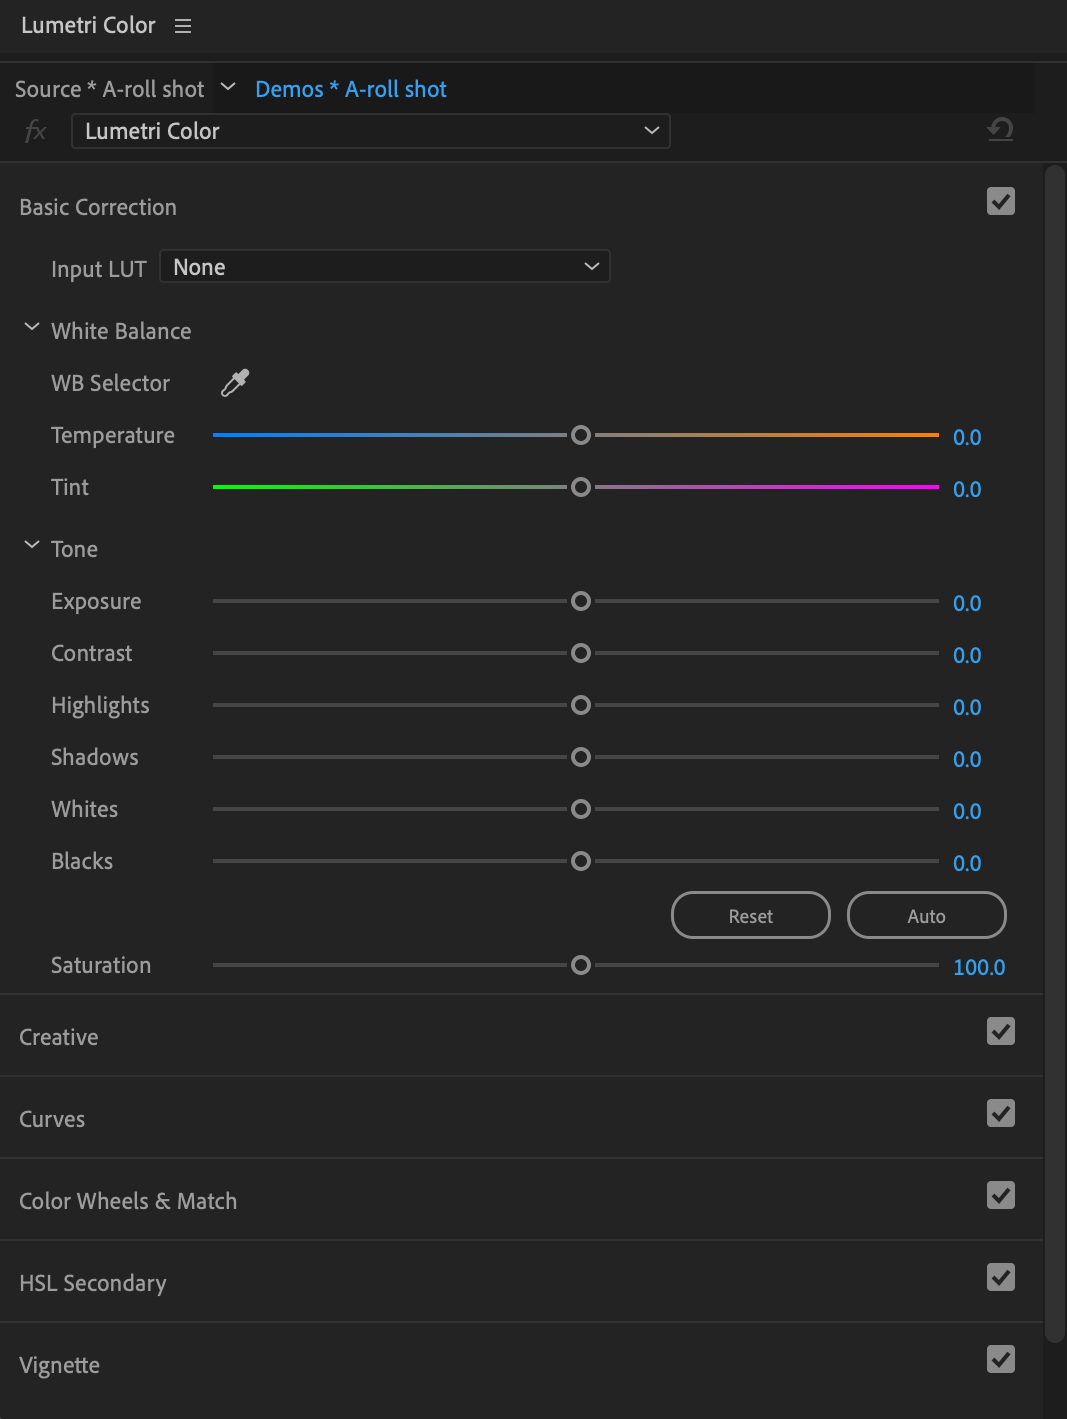
Make basic corrections.
Enhance shots.
Auto button
Sometimes it’s all you need and sometimes it seriously fails. Click at your own risk.
White balance
Use the eyedropper to sample a part of your image that should be white, or adjust the temperature and tint sliders below.
Tone
Adjust familiar sliders to fix color problems and make shots look natural.
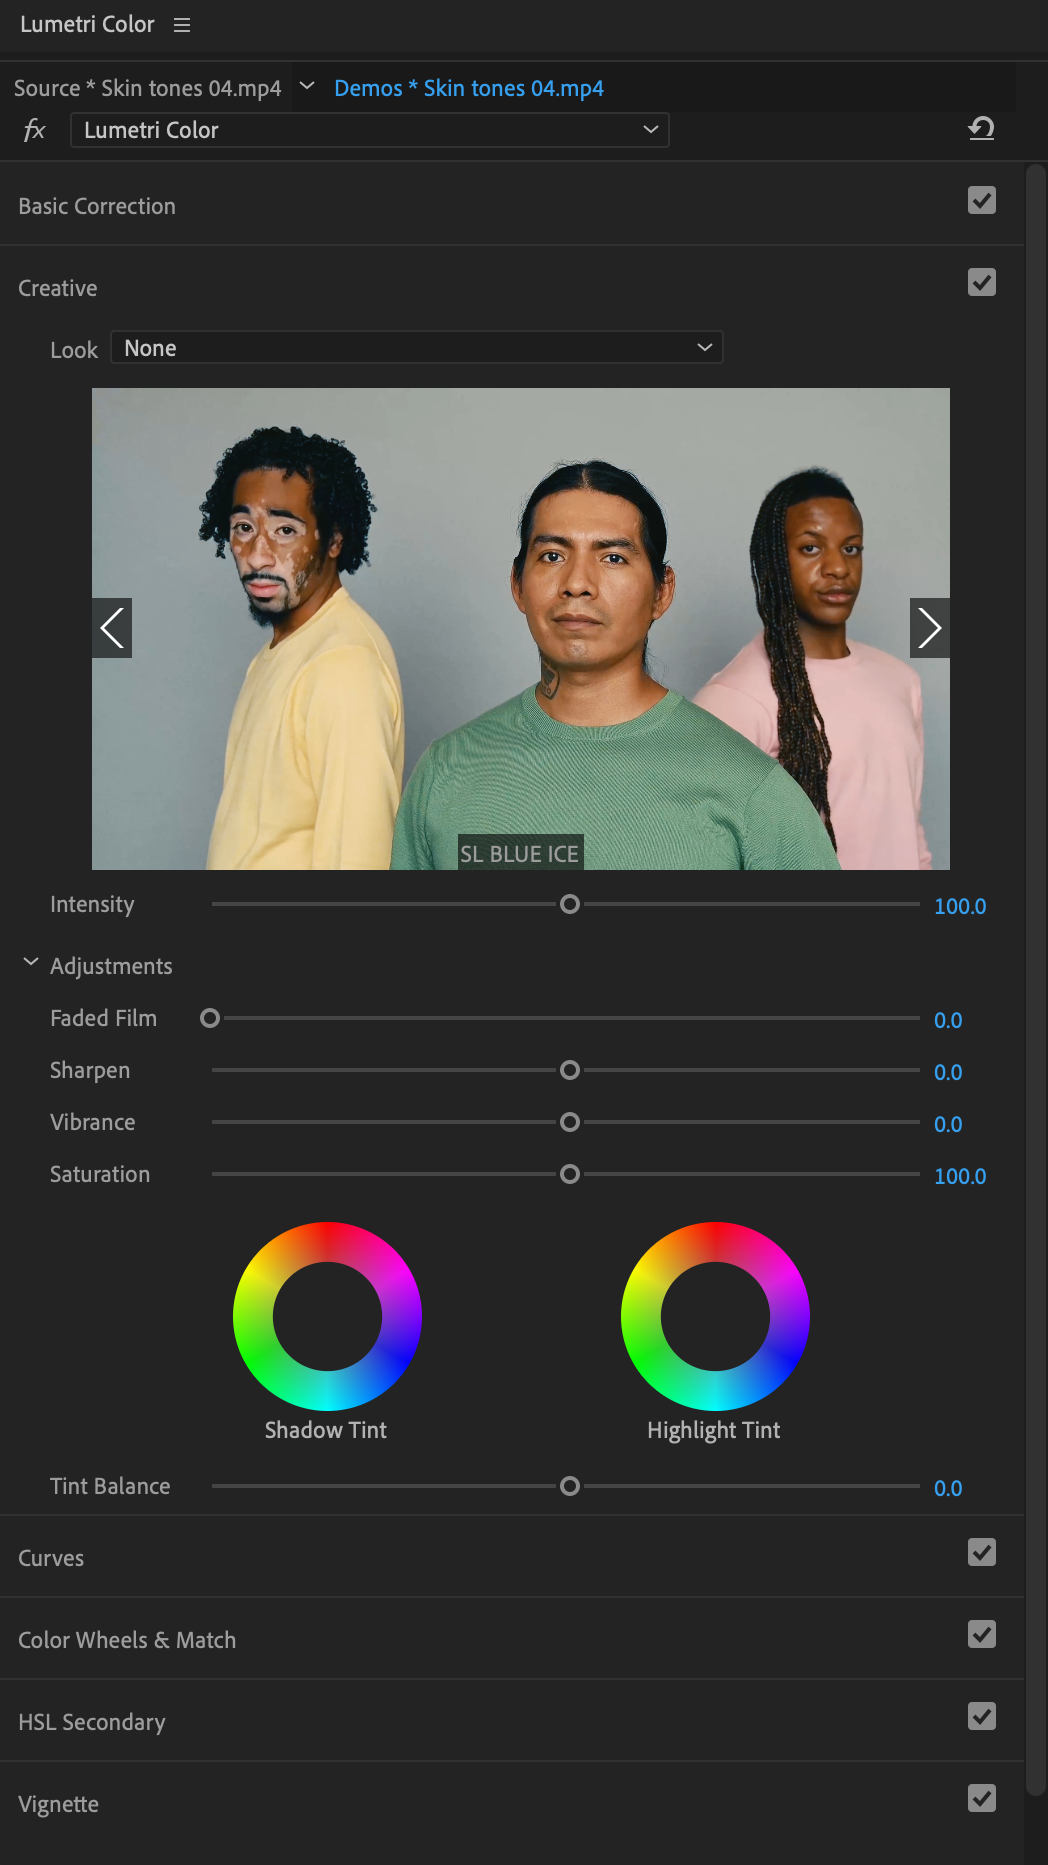
Add creative looks.
Apply color filters.
Previews
Click right/left to preview creative looks, double-click to apply, and adjust the intensity below.
Vibrance
This is nice because it adjusts saturation, but only for the pixels that aren’t already really saturated.
Shadow / highlight tint
Click the center of the wheels and drag outward toward a color to increase it. The farther outward you drag, the more saturation.
Use Curves for precise adjustments.
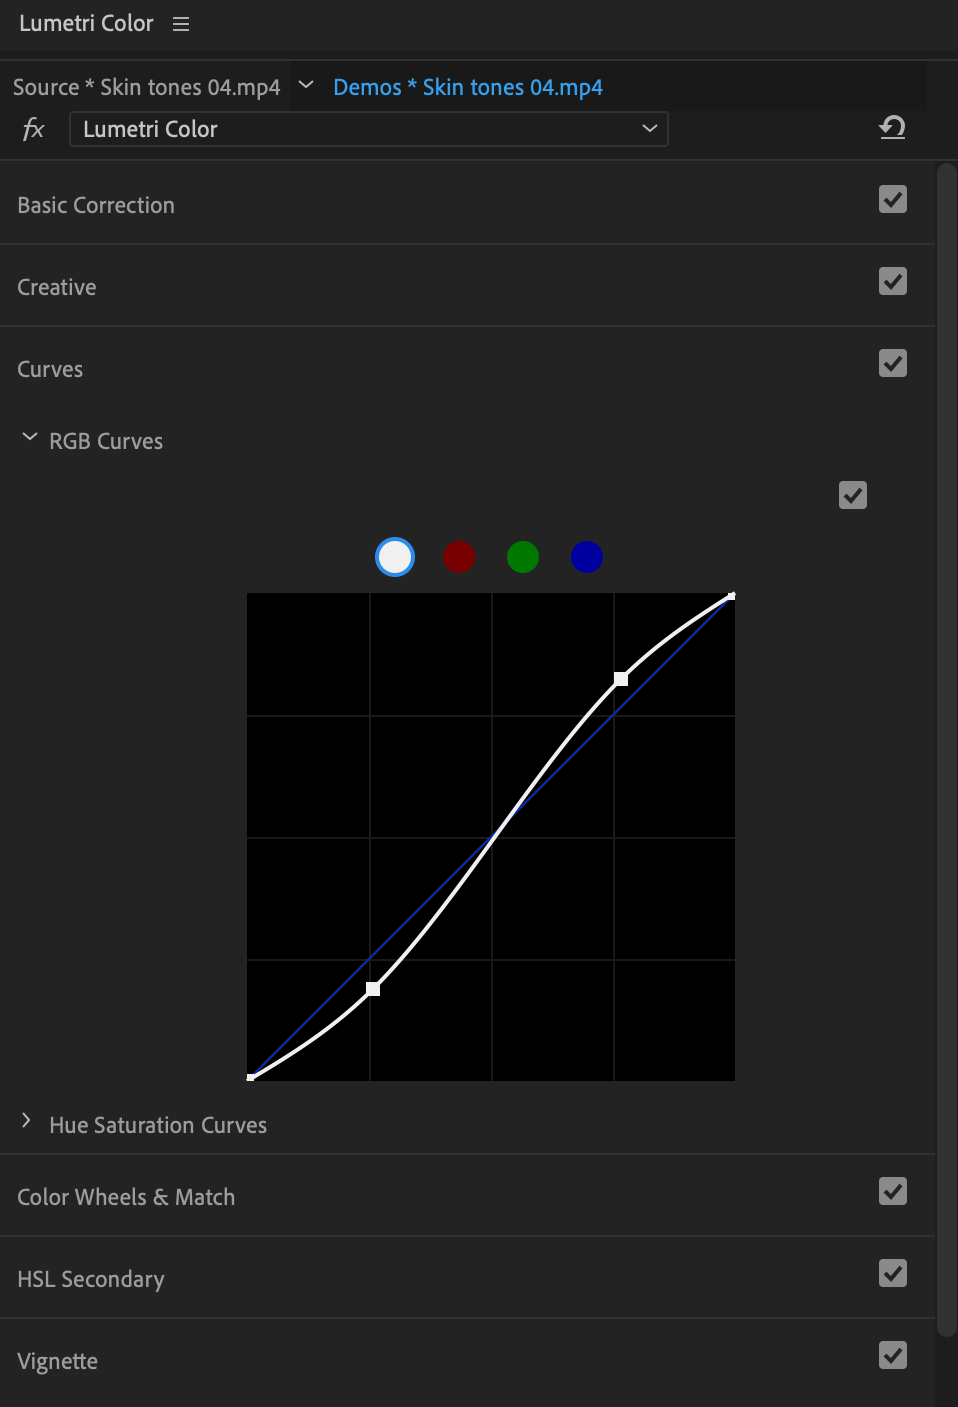
Adjust brightness with the luma curve.
When to use
This white line will let you make very specific tweaks to your shot’s luminance (a.k.a. brightness).
How to read
blacks → bottom left
shadows → lower left
midtones → middle
highlights → upper right
whites → top right
Add points
Click on the line to add as many points as you want.
Adjust brightness
Drag points up to lighten and down to darken.
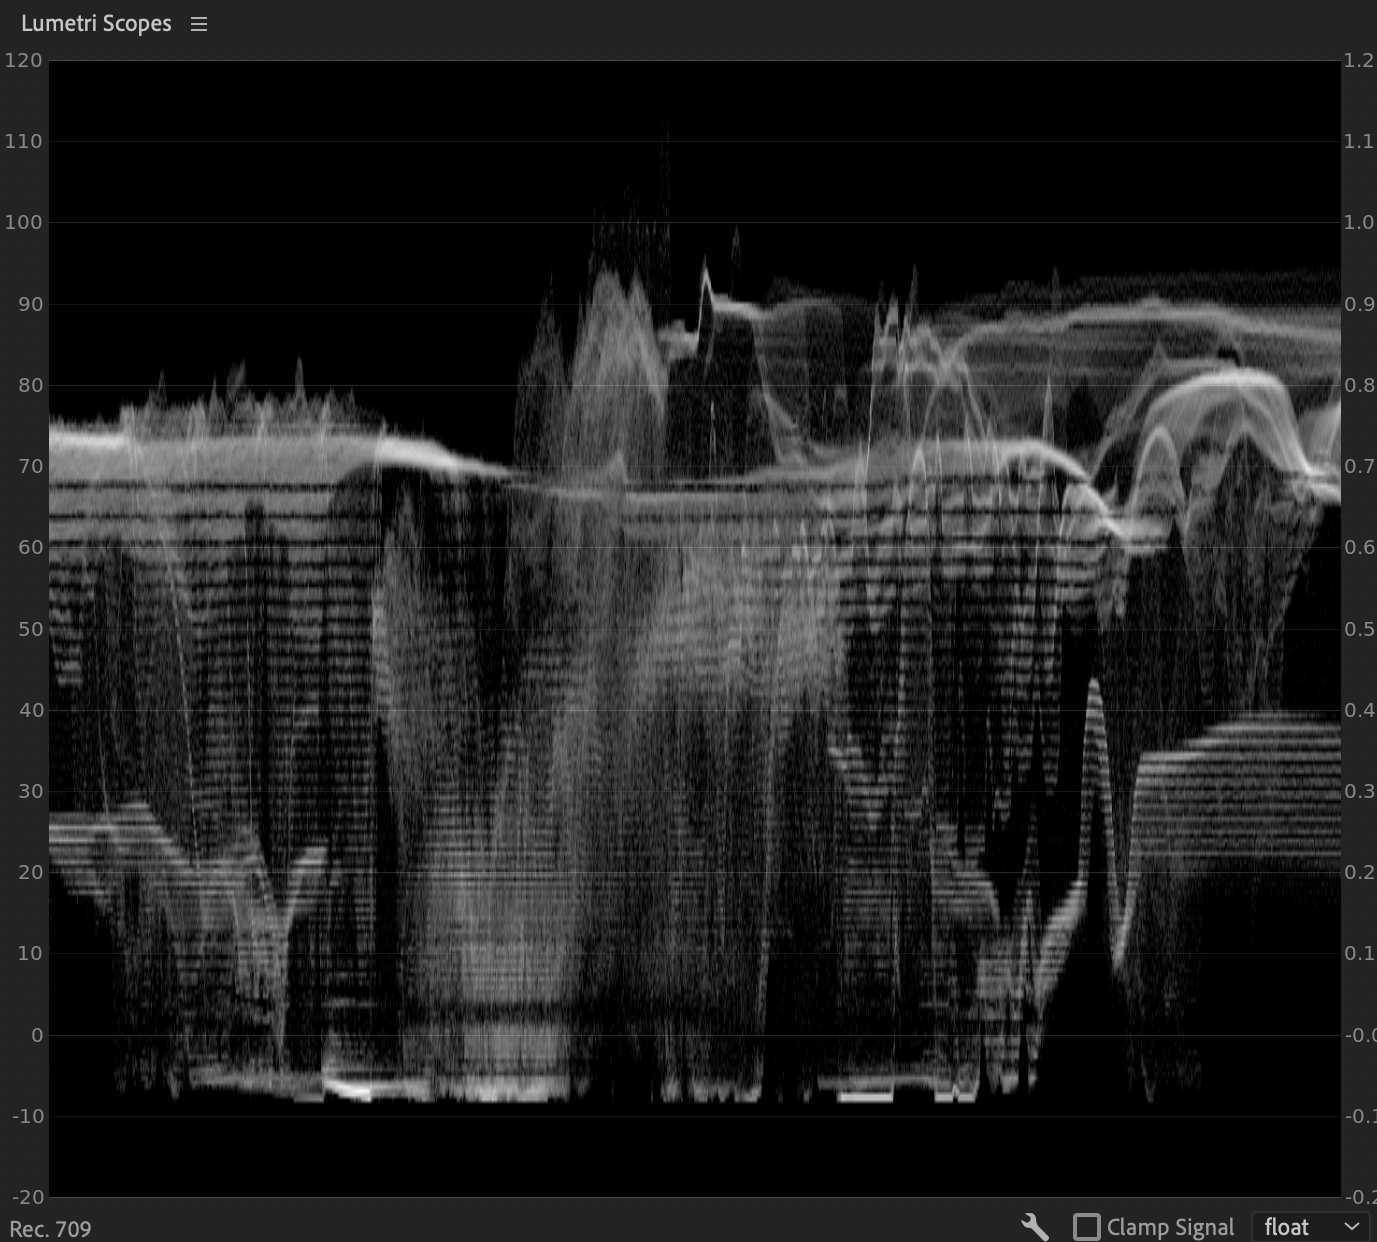
Monitor brightness with the luma waveform.
When to use
Use this scope to monitor your shot’s brightness levels.
vertical axis
Notice the left vertical scale. Black’s at 0 at the bottom. White’s at 100 at the top.
Horizontal axis
The white “smoke cloud” maps your shot’s pixels from left to right.
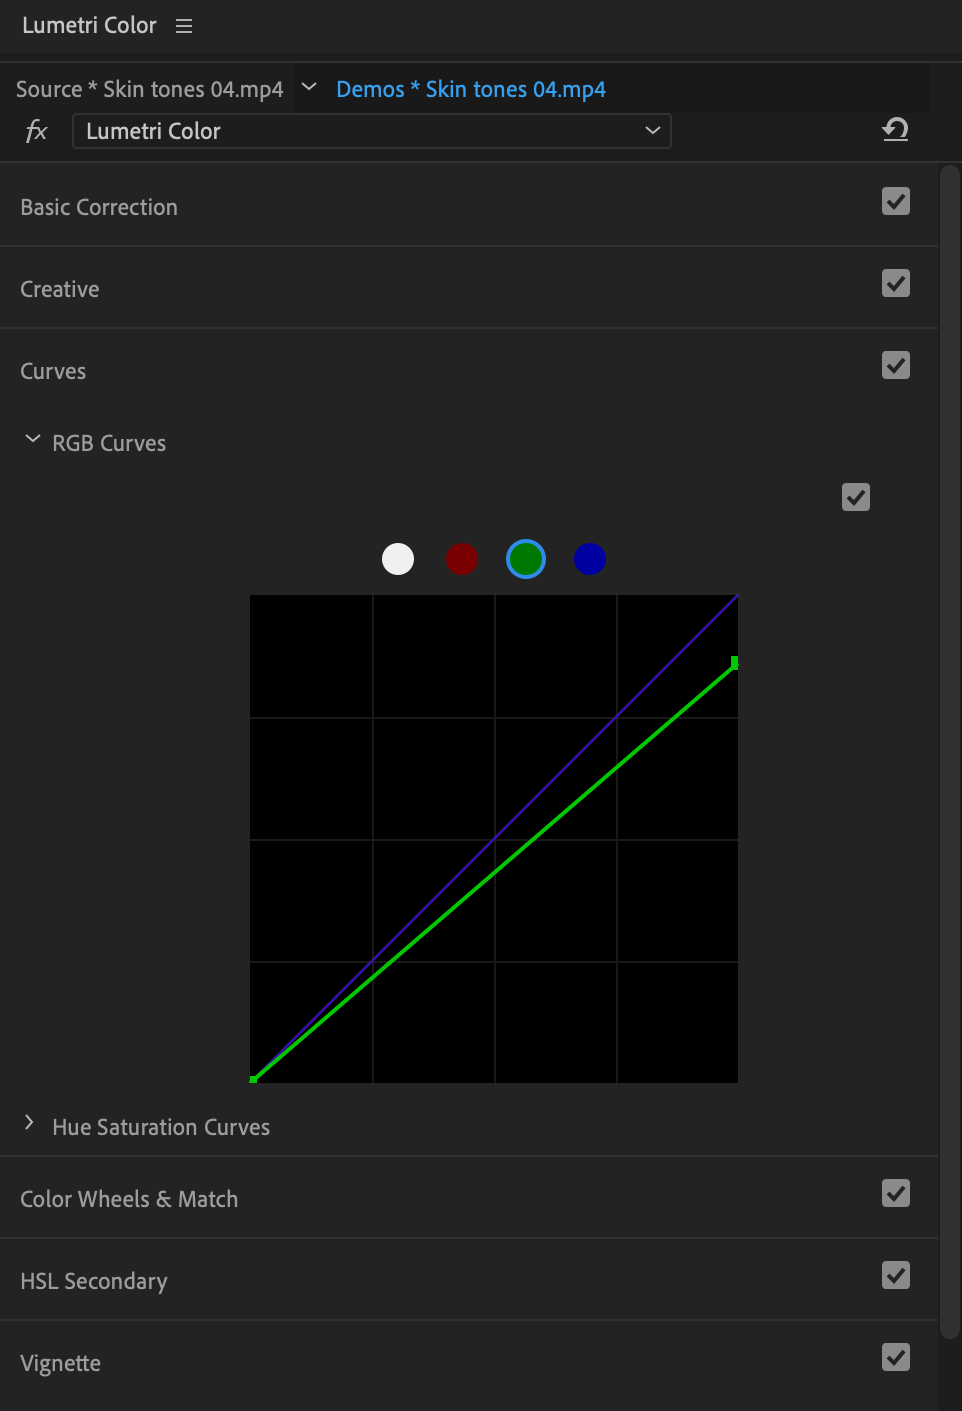
Fix color imbalances with RGB Curves.
When to use
Repair stubborn white-balance issues by adjusting the red, green and blue levels in the shot.
How to use
Drag the top end of these lines until the colors in the RGB Parade scope become even.
Adjust colors
Drag down to decrease a color.
Drag up or left to boost a color.
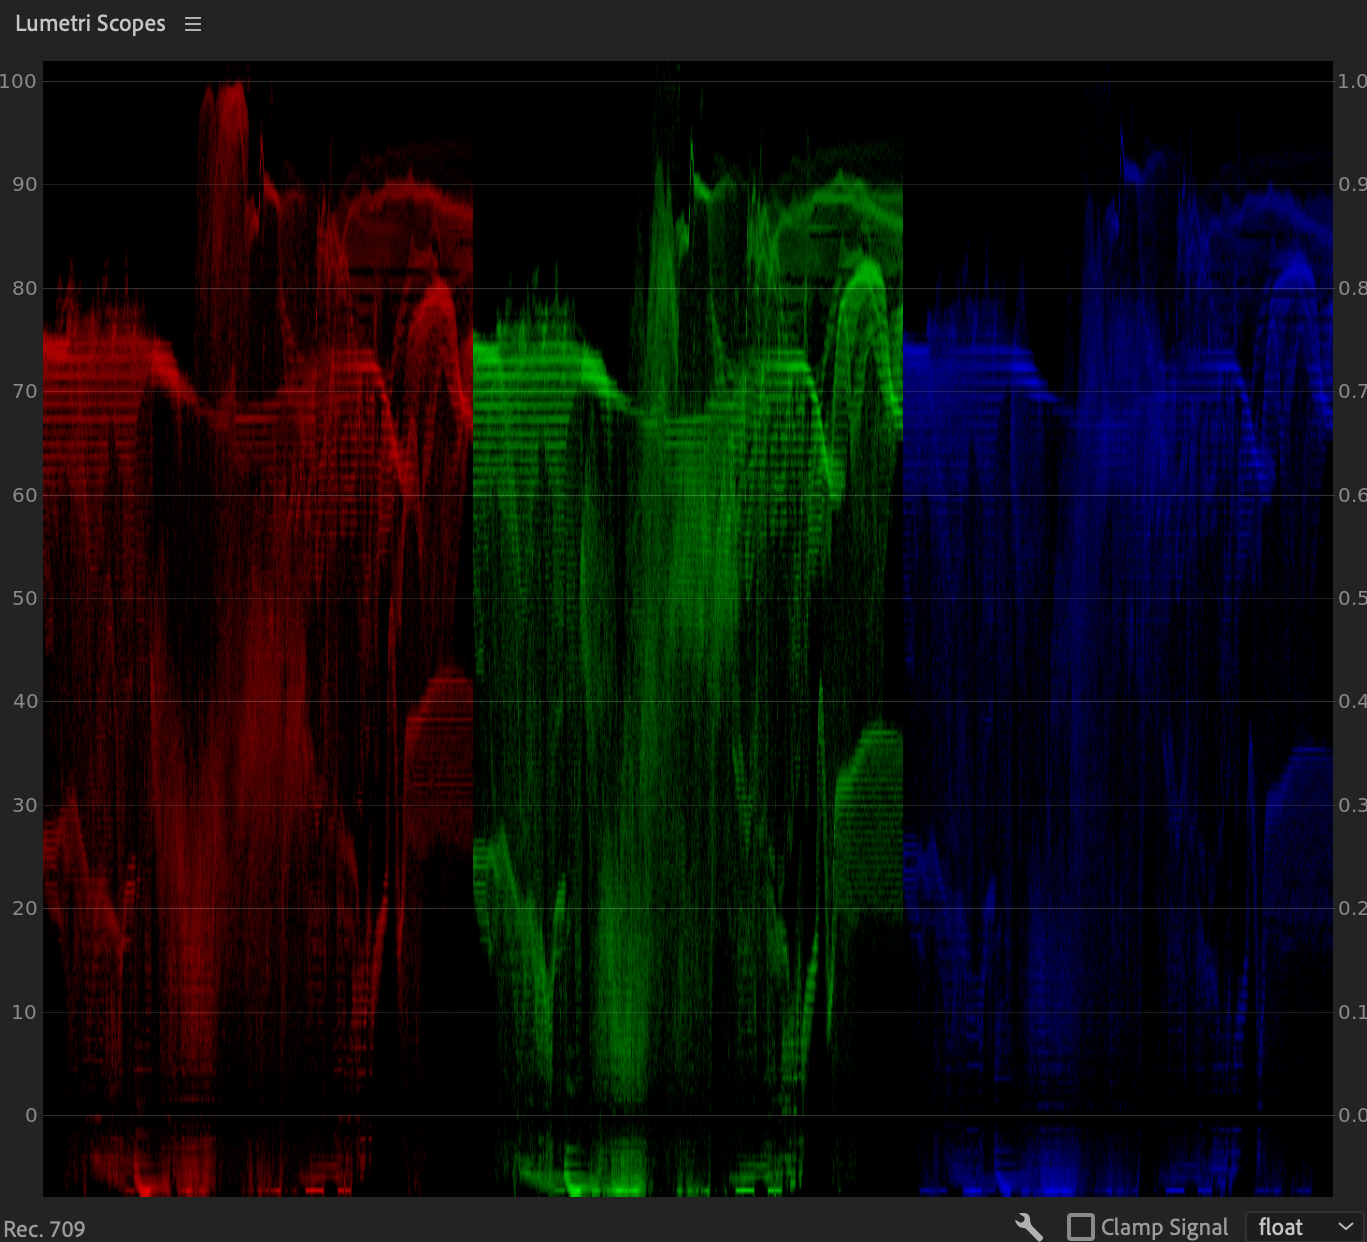
Monitor color levels with RGB Parade.
When to use
Monitor the red, green and blue levels in your shot so you can fix difficult white-balance problems.
How to use
If one of these waveforms is way higher or lower than the others, adjust the RGB Curves until the colors become even.
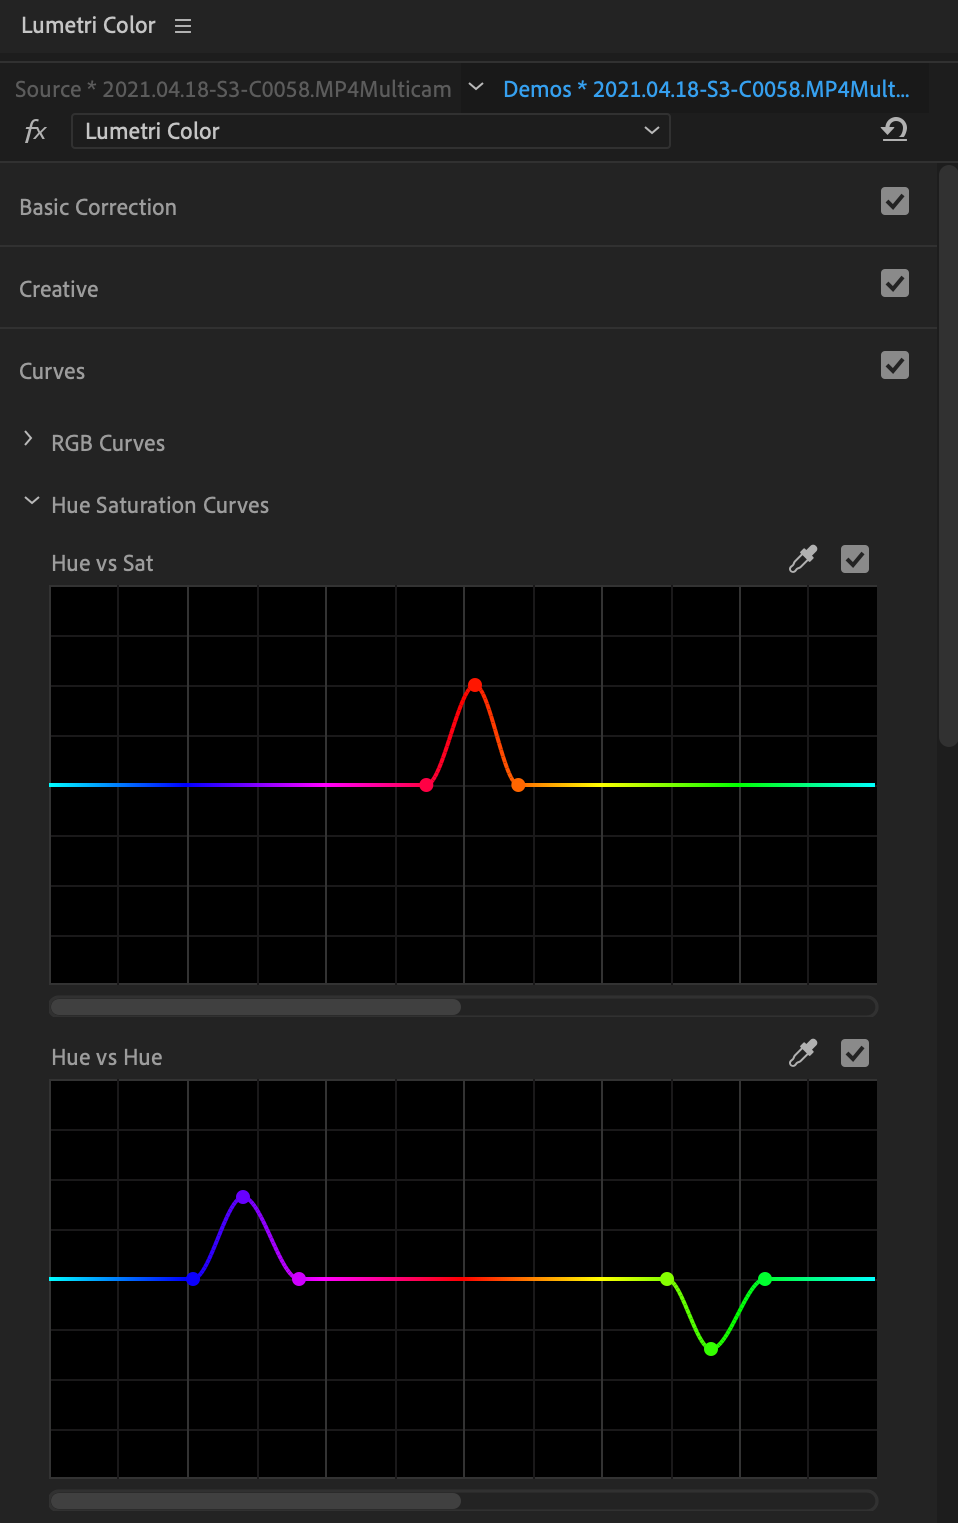
Make subtle or surreal changes with the Hue Saturation Curves.
When to use
These are easy ways to make color edits to very specific parts of your shot.
How to sample
Use the eyedropper to click on your shot in the Program panel and sample pixels based on the first attribute.
Three dots will appear on the line matching what you sampled.
How to adjust
Adjust the middle point up or down to edit the pixels you targeted based on the second attribute in the curve’s name.
Add more points to the line by clicking on it or sampling again.
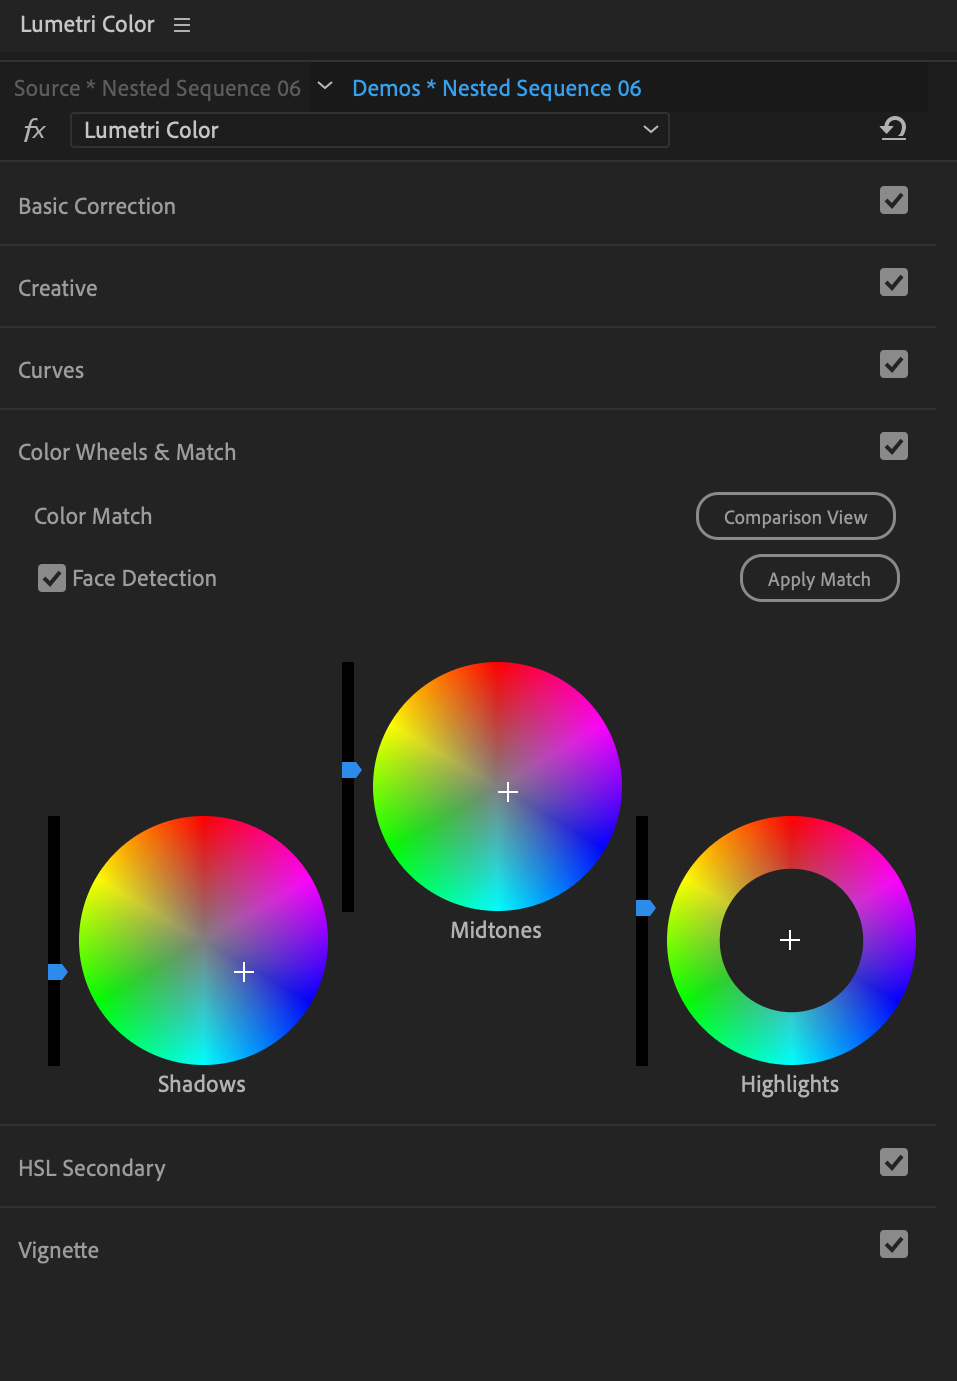
Use Color Wheels & Match to keep shots consistent.
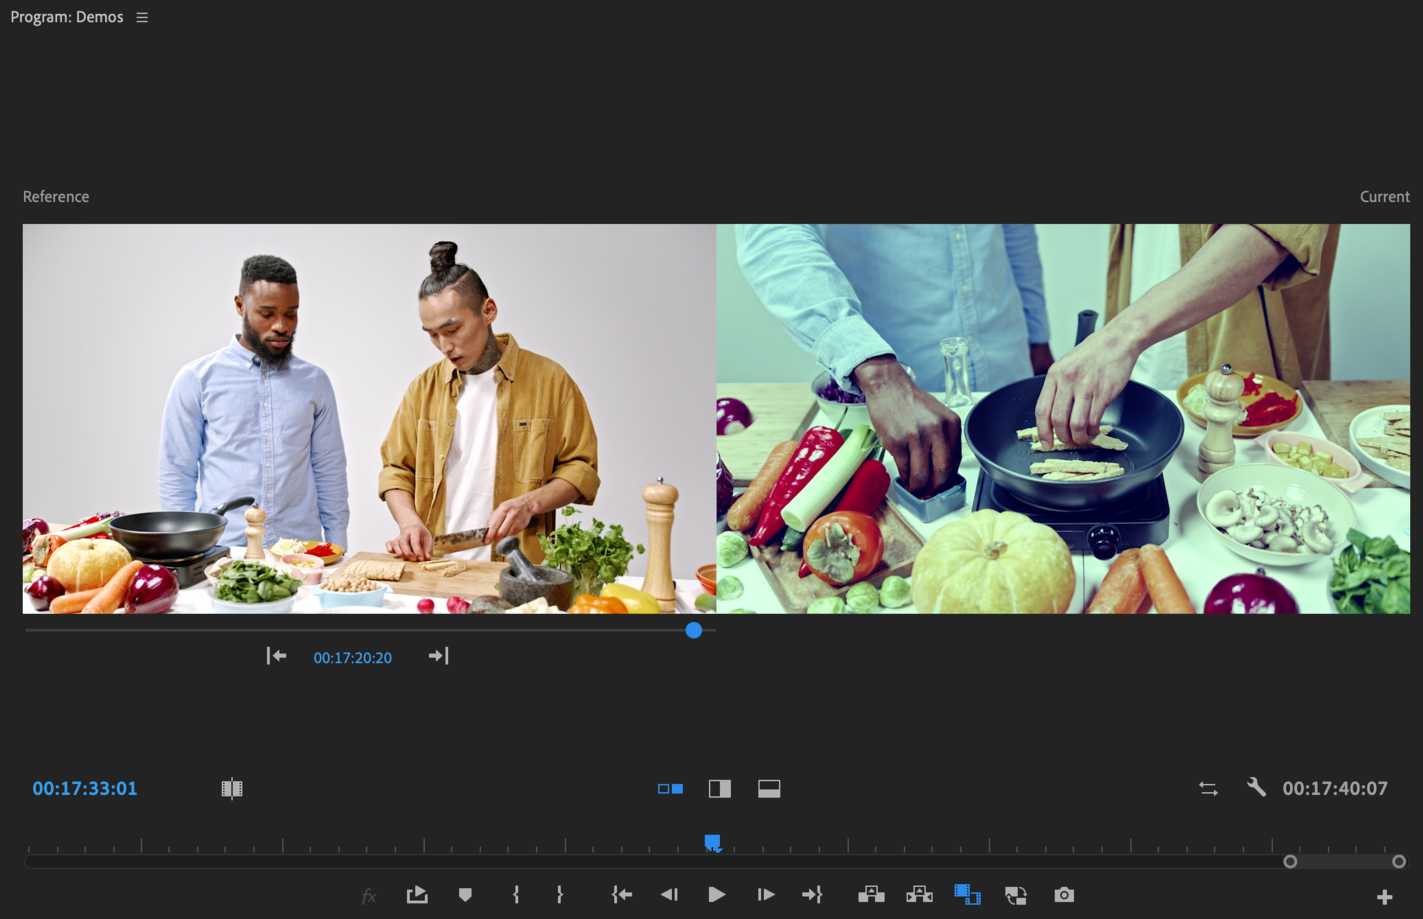
Switch to Comparison View.
View two shots at once by clicking the Comparison View button, either in the Color Wheels & Match section of Lumetri Color or at the bottom of the Program panel.
Match color settings.
Apply Match
Click the Apply Match button in Lumetri Color, and Premiere will try to automatically match the color of your current shot to your reference shot.
Color wheels
Use these to refine the match or adjust your shot in general.
hue
Click in the center of a wheel and drag toward a color to increase it in your shot, moving outward for more saturation.
brightness
Move the vertical sliders up to lighten and down to darken.
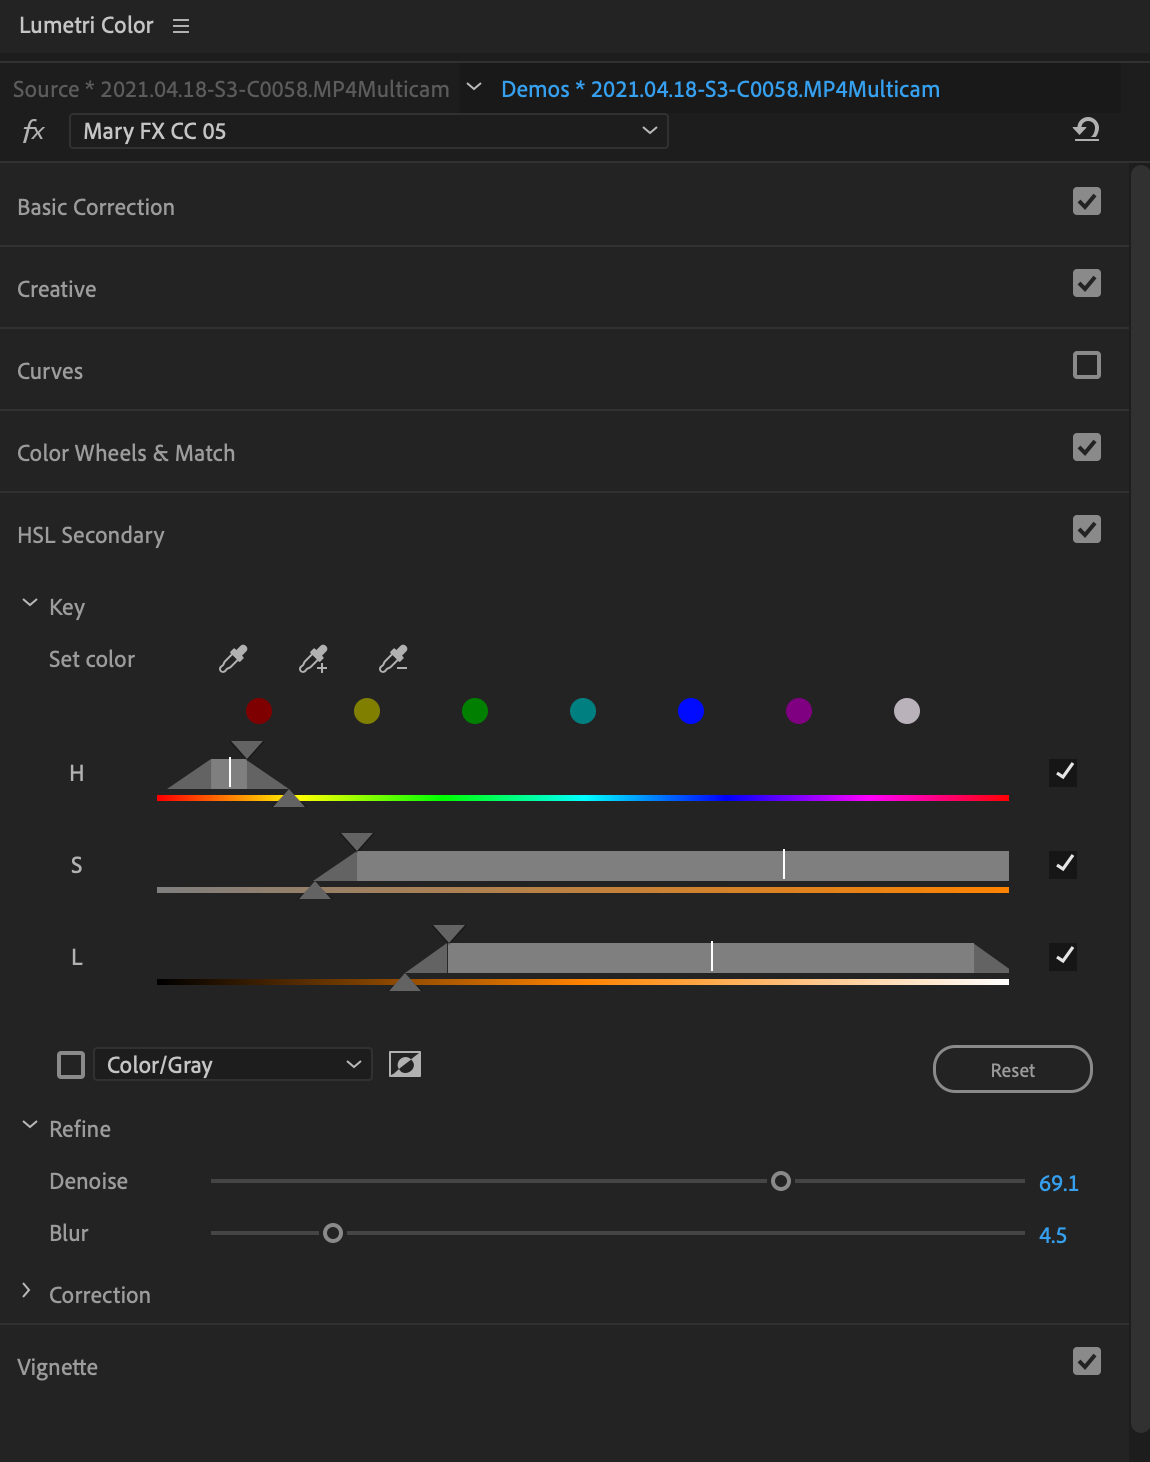
Fix skin tones with HSL Secondary tools.
Select a key.
Sample your subject
Use the eyedropper to sample your subject’s skin in the Program panel.
Adjust HSL ranges
Adjust the hue, saturation and lightness sliders to refine how much of your subject’s skin is keyed (or isolated for correction).
Denoise and blur
Smooth and feather your selection so it blends with the rest of your shot.
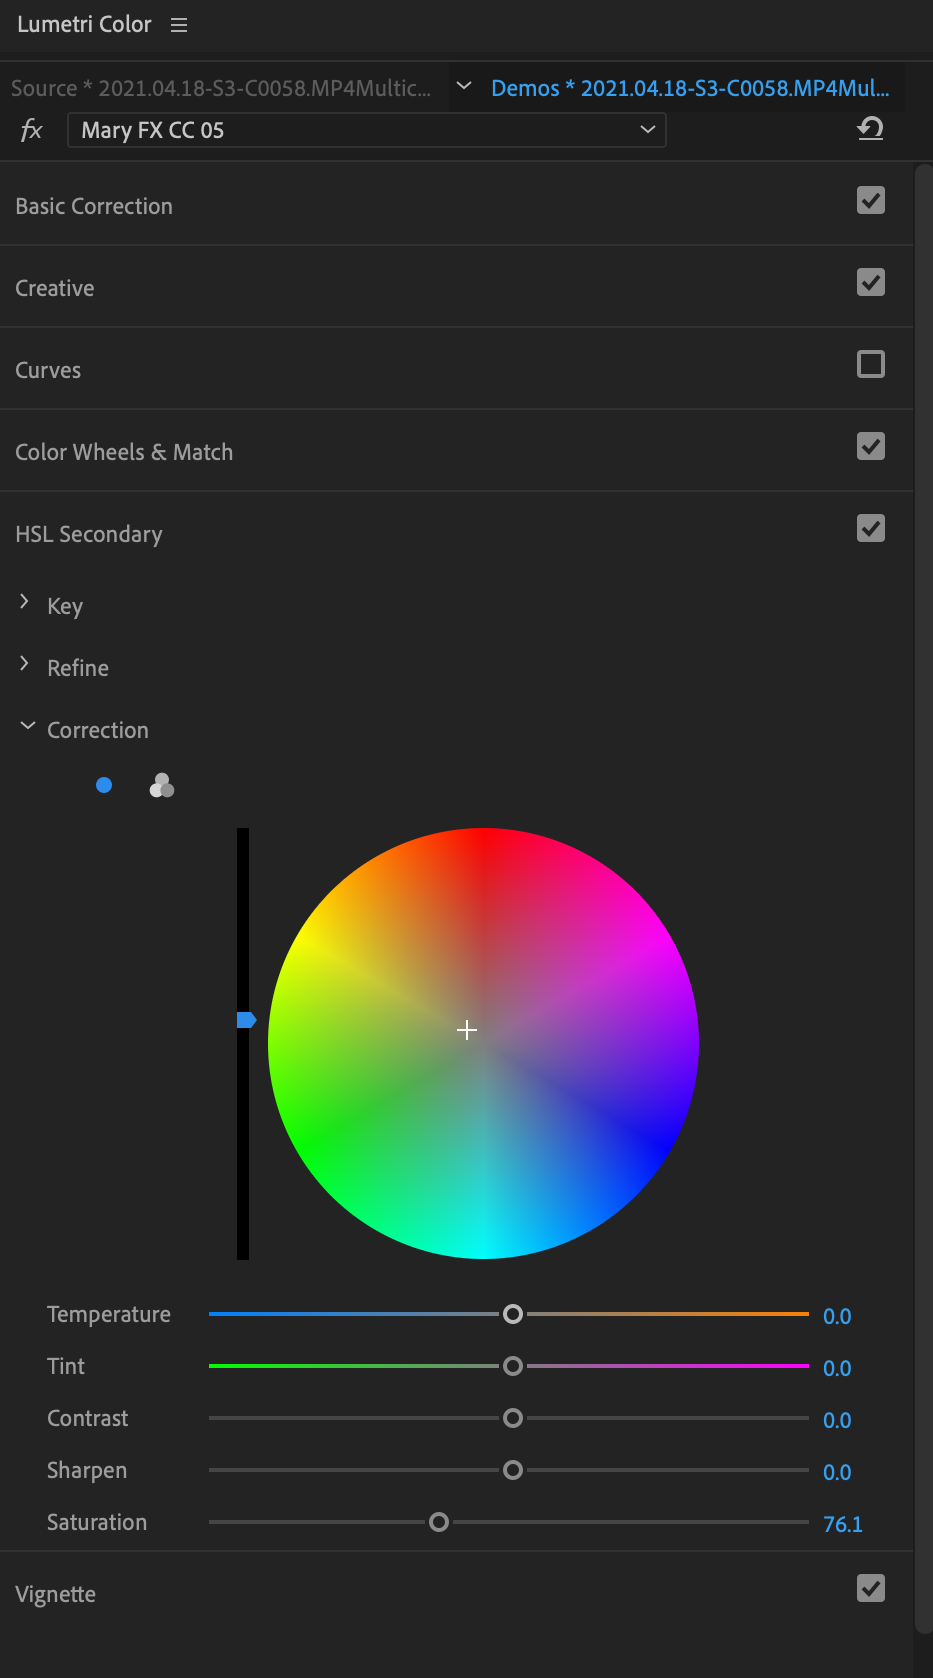
Make secondary corrections.
Use the correction settings in HSL Secondary to adjust the color only for the selection that you’ve keyed.
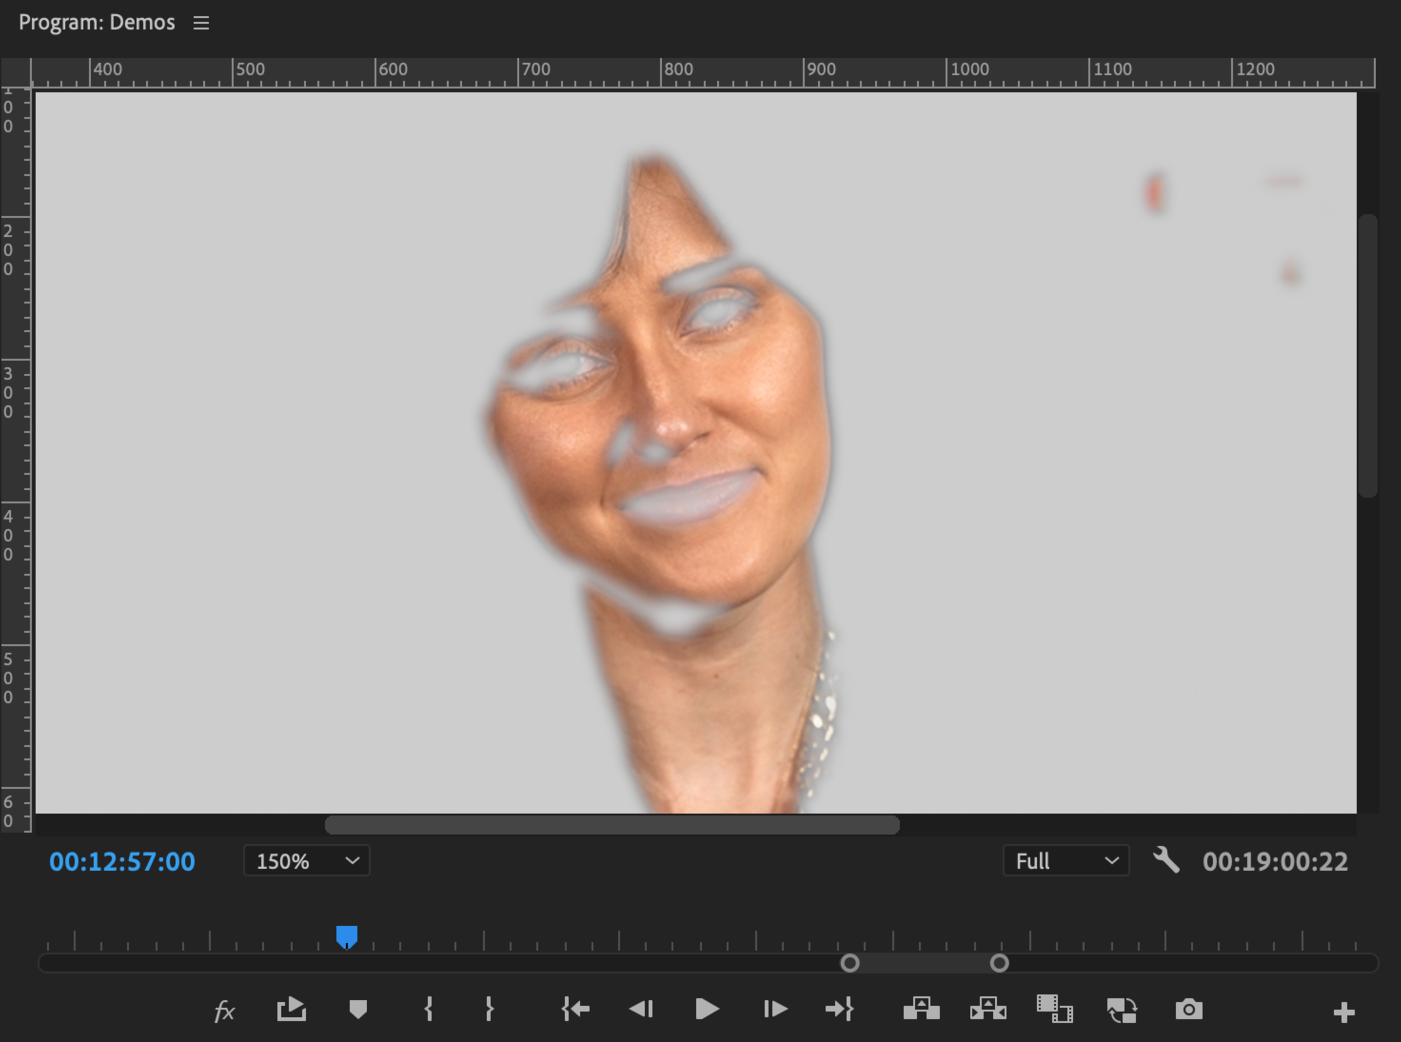
Isolate your key.
Check the Color/Gray check box in HSL Secondary to show only what you’ve selected. This will let you view skin tone levels using the scope below.
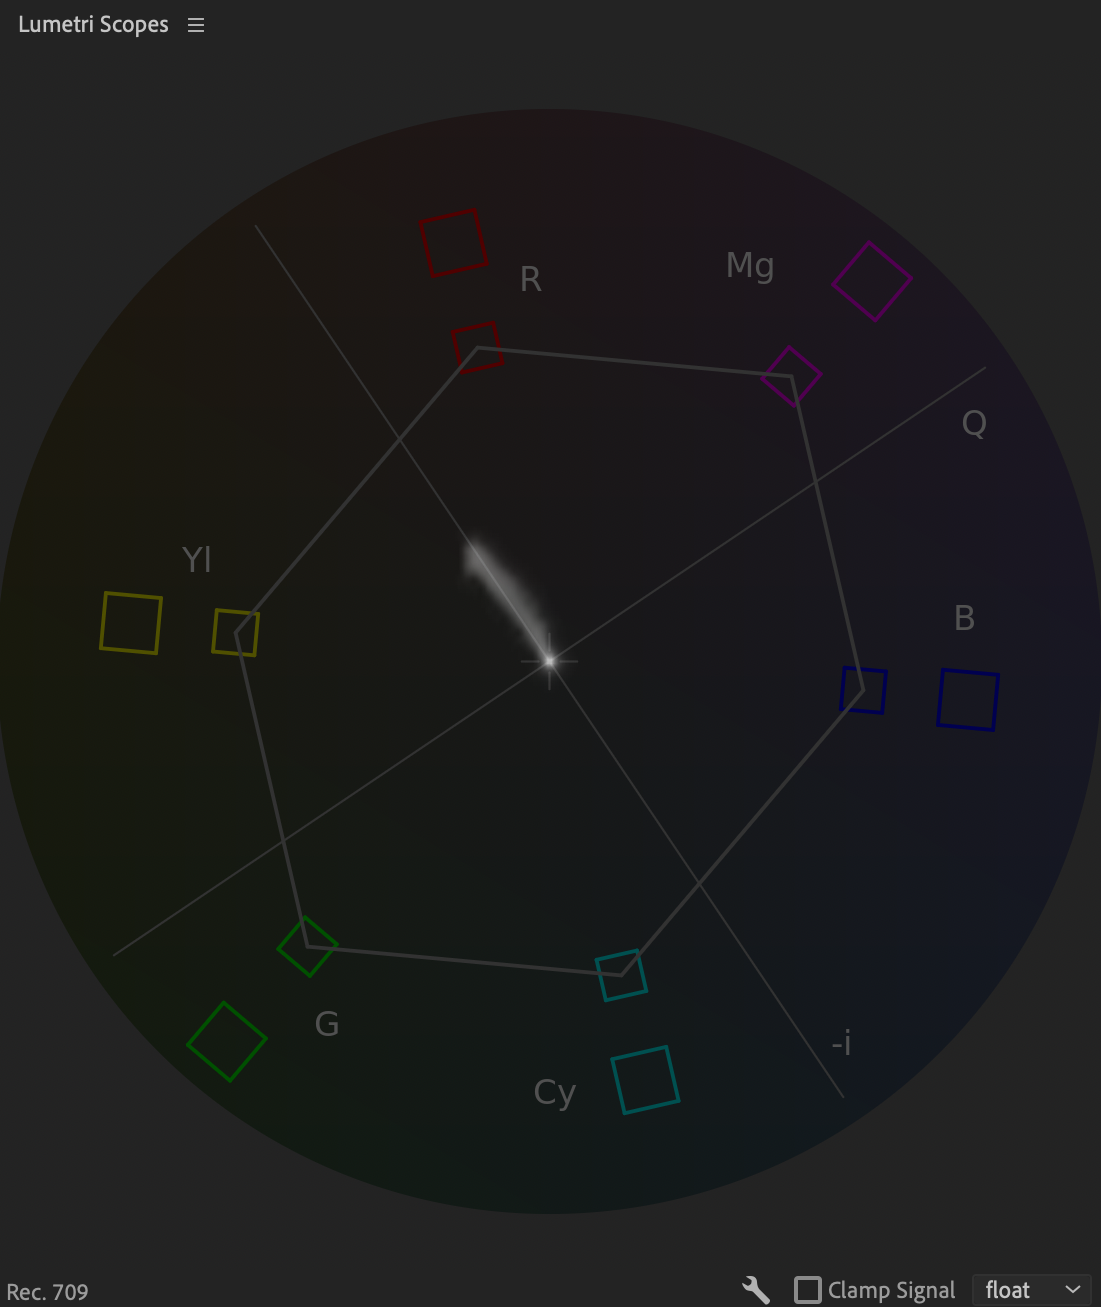
Monitor hue and saturation with the Vectorscope YUV.
How to read
The white “smoke puff” represents the pixels in your shot.
The farther outward they are toward a color, the more saturated it is in your shot.
The big boxes = 100% saturation.
The small boxes = 75% saturation.
skin hue
Adjust the hue (or color) of your subject’s skin until it lines up with the skin tone line.
skin saturation
Adjust your subject’s skin until the saturation is between 20-50%, going higher for medium skin tones.
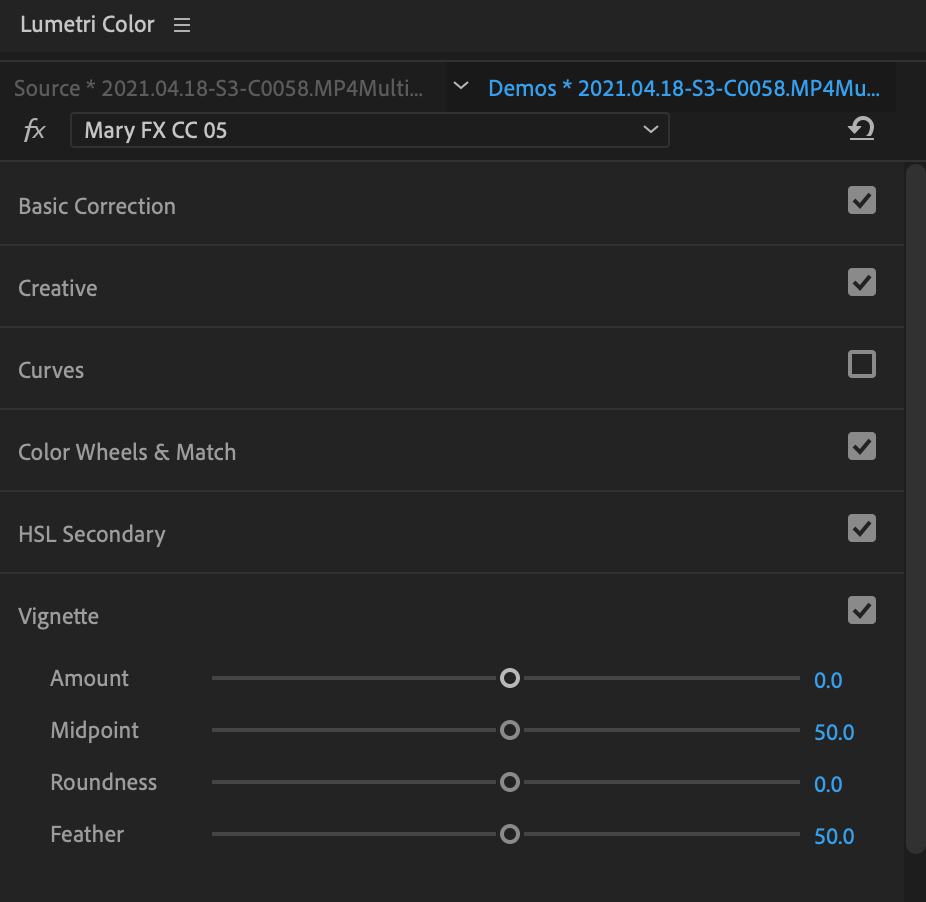
Add a vignette.
Make your subject stand out.
Darken or lighten the edges of your shot to draw attention to your subject with the Vignette section.
Work efficiently.
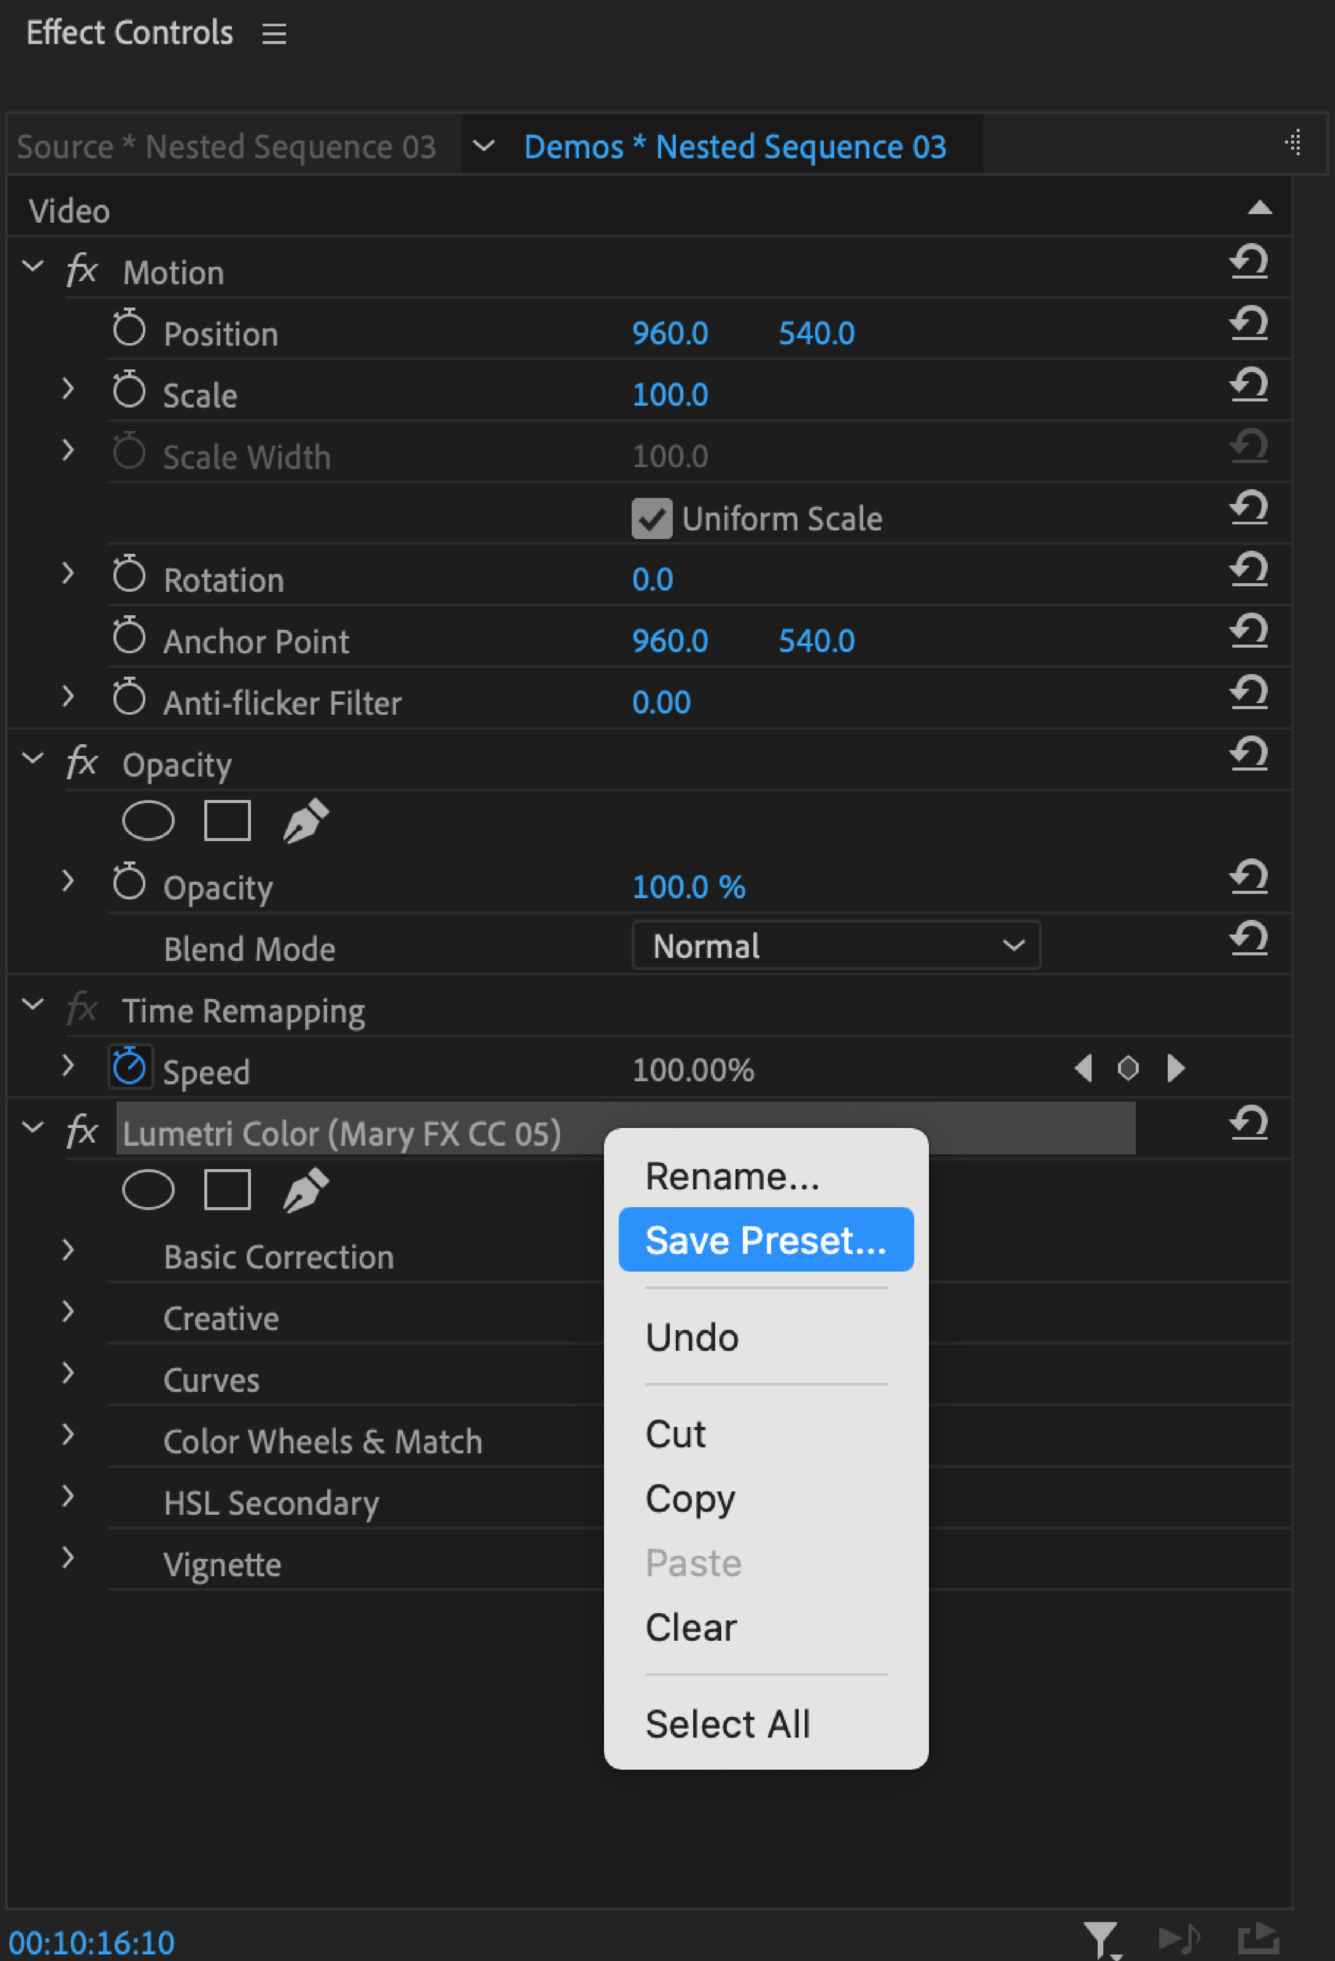
Save effect presets.
Right-click the Lumetri Color effect in the Effect Controls panel to save color settings as an effect preset.
Edit multiple clips with adjustment layers.
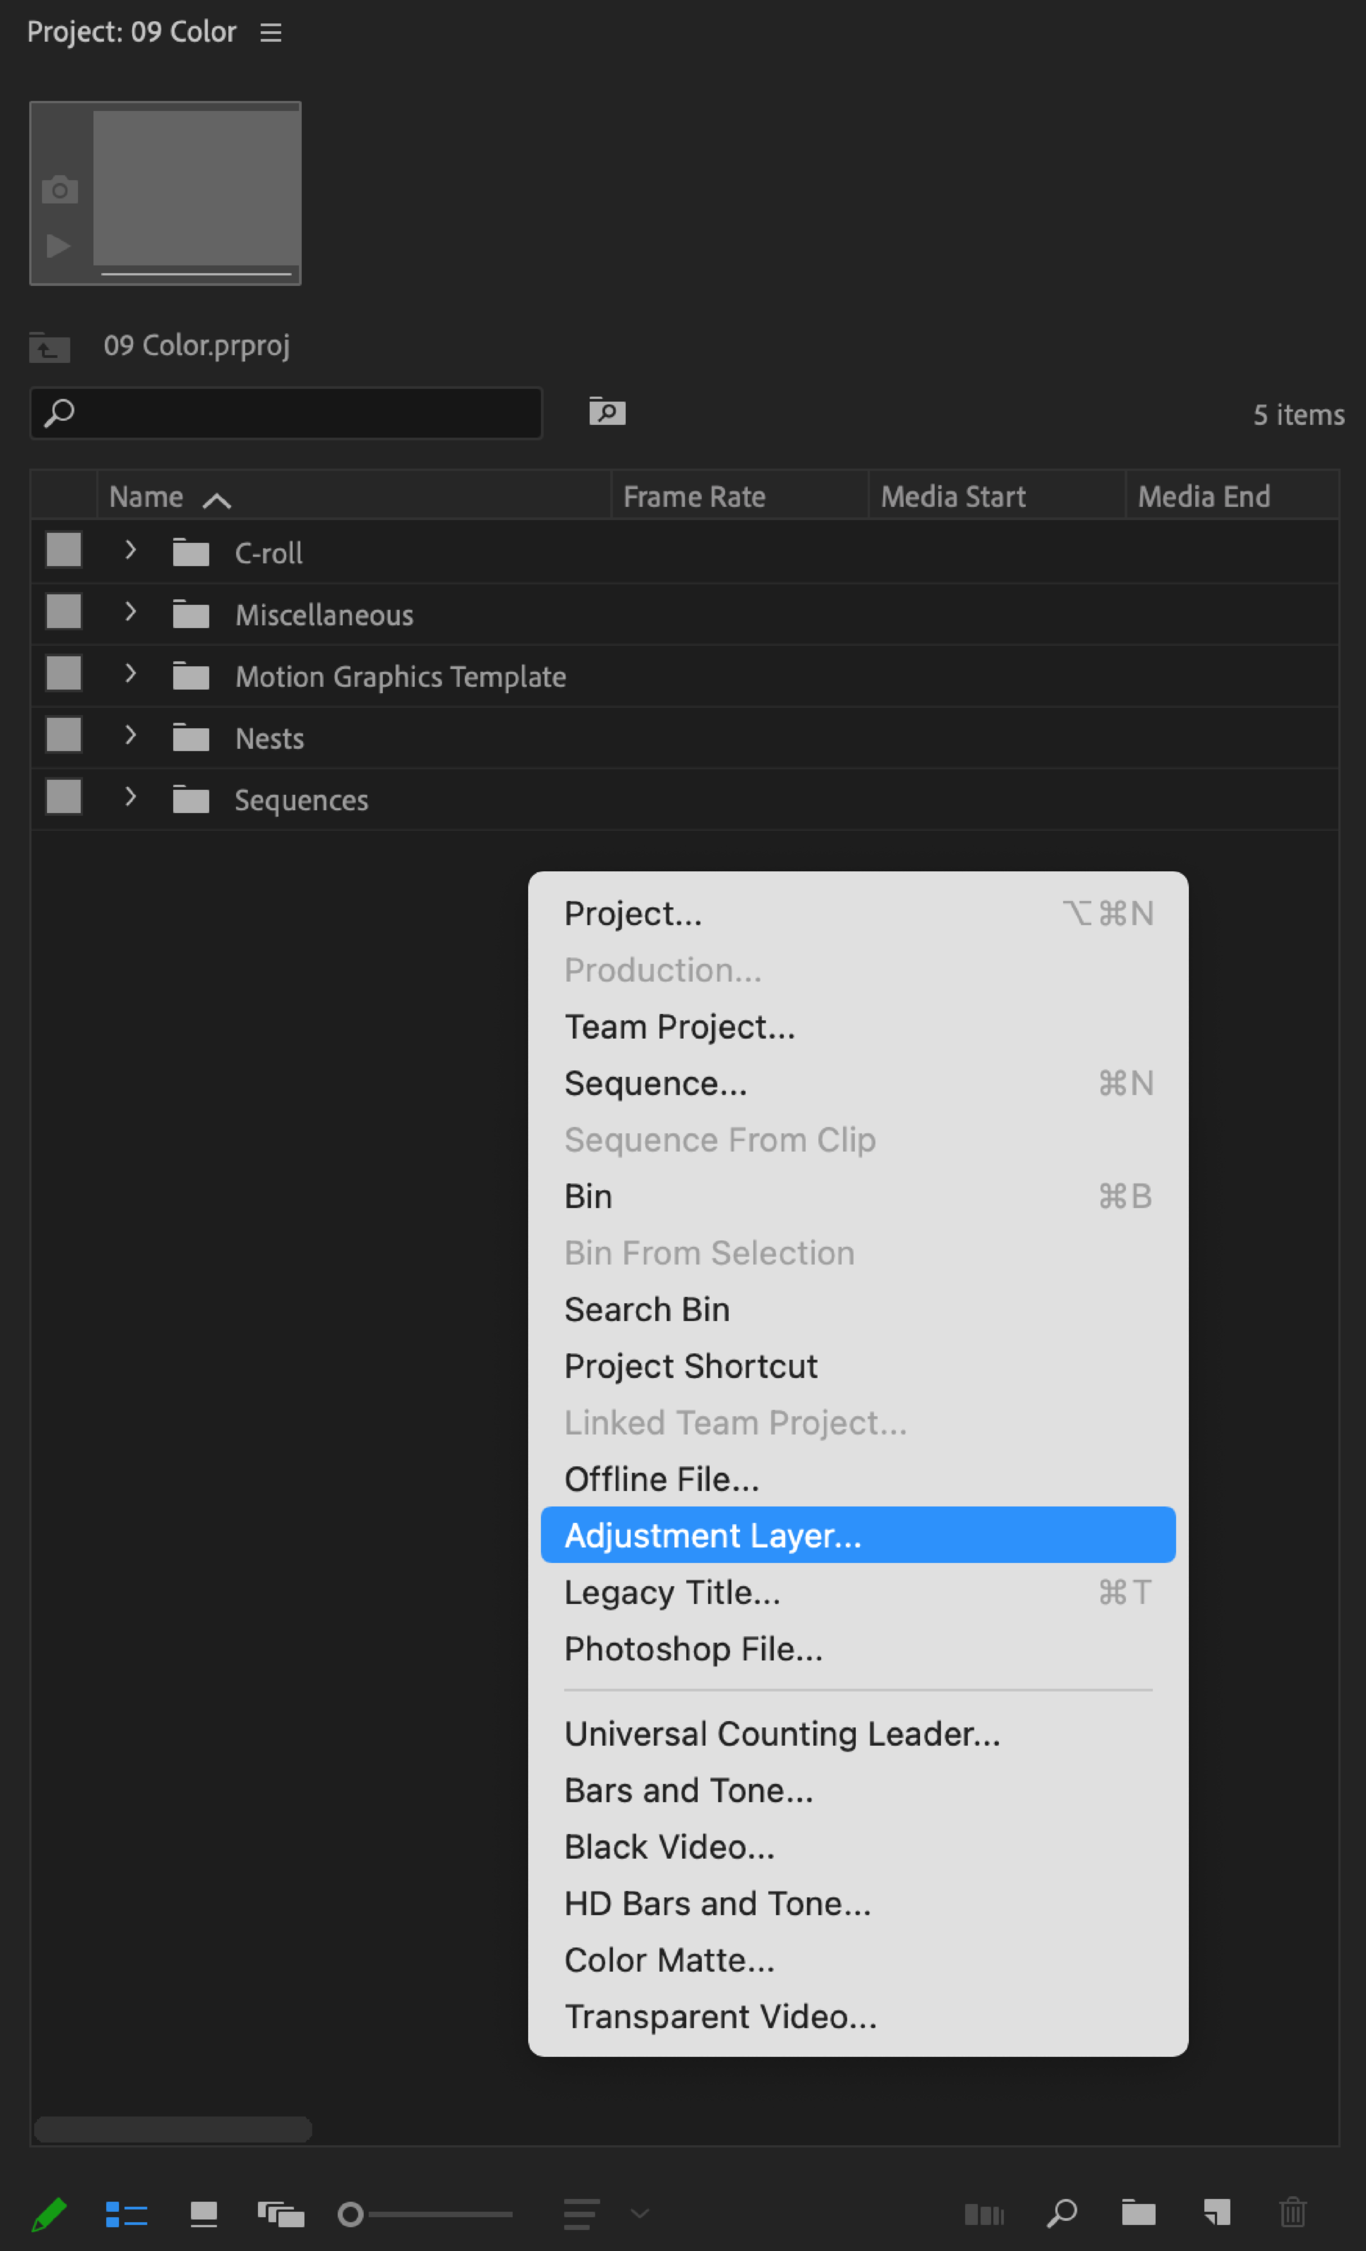
create
Right-click in the Project panel and select Adjustment Layer.
Add to timeline
A new Adjustment Layer will appear in your Project panel. Drag it to your timeline above all of the clips you want to adjust.
adjust
Select the Adjustment Layer on your timeline to adjust its settings in Lumetri Color or to drag effects to it. Any changes will apply to clips below.
Add effects to source footage.
Drag color effects from the Effects panel directly to source footage in the Project panel. Those effects will cascade to child clips in any sequence.
Create custom looks.
Export a custom look
Go to the Lumetri Color panel → top hamburger menu → Export .look.
Add a plus sign to the start of your look’s name so it shows up first in the options.
Save a custom look
Mac: /Library/Application Support/Adobe/Common/LUTs/Creative
Windows: C:\Program Files\Adobe\Common\LUTs\Creative
Note: You might need to create the LUTs and Creative folders. Keep in mind that their names are case-sensitive.
Apply a custom look
Restart Premiere.
Go to the Lumetri Color panel → Creative section, and your custom look should appear in the dropdown menu and previews below.
Focus on your story.
By Robert E. Blackmon via Giphy
Don’t get lost in all the settings!
Remember color is subjective, and there are no wrong adjustments.
As long as you’re using color to amplify your the tone of your story, then you’re doing it just right.

